Back in the day, if you had a machine with a dynamic IP and you needed to accesss it remotely, you’d just create a DynDNS account, download their app and it would keep your DNS record up to date.
Nowadays, I’m more likely to manage my own records via the Azure DNS service instead.
Updating the DNS records dynamically is fairly straightforward by using the Azure CLI and a bit of powershell:
- Install the Azure CLI and run
az loginto authenticate (if the updater runs under the current user account) - Use
az account showto ensure you’re using the right one. Otherwise, you can either runaz account set --subscription [ID]at this point or add that to the script - Make sure you can list your record sets with
az network dns record-set list --resource-group [RG] --zone-name [DOMAIN] - Create a powershell script with the following content:
$alias = 'mysubdomain'
$domain = 'mydomain.com'
# retrieve current internet IP
$ip = Invoke-RestMethod https://api.ipify.org
# resolve current record IP to only update if needed
$dns = Resolve-DnsName "$alias.$domain" | select -expandproperty ipaddress
if ($ip -ne $dns) {
    echo "$ip is different from resolved $alias.$domain of $dns"
    # delete existing record
    az network dns record-set a delete --resource-group [RG] --zone-name $domain --name $alias --yes
    # create new record
    $state = az network dns record-set a add-record --resource-group [RG] --zone-name $domain --ttl 10 --record-set-name $alias --ipv4-address $ip | convertfrom-json

    if ($state.provisioningState -eq "Succeeded") {
        echo "Updated $alias.$domain > $ip"
    else {
        echo "Failed to update $alias.$domain > $ip"
    }
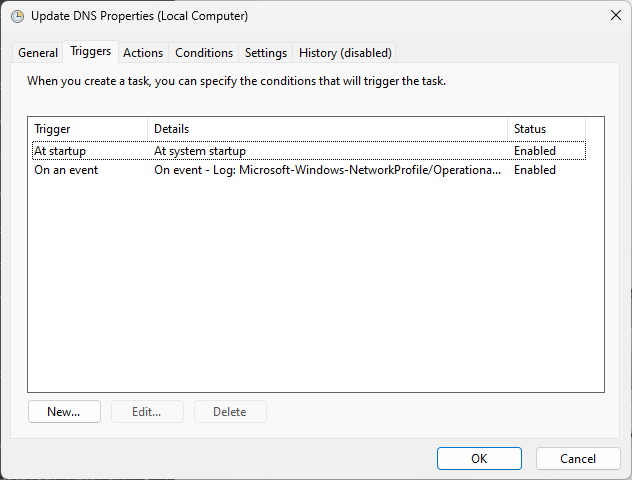
- You can now create a schedule in Task Scheduler that “Starts a program” with
powershellas the command and-noprofile .\dns.ps1as the argument, to run from the folder where you saved the above script.
I have the schedule set to to run on system startup as well as network operational status change event:
Enjoy!
/kzu dev↻d